Cisco ASA PAT Configuration
In our previous article we have configured static NAT and dynamic NAT on Cisco ASA. Moreover in another article we have configured Cisco ASA dynamic NAT with DMZ. In this lesson we shall configure Port Address Translation or PAT on Cisco ASA firewall.
Port Address Translation (PAT), also known as Network Address Translation (NAT), is a method of allowing devices on a private network to access the internet using a single, public IP address. This is often used in scenarios where the number of devices on the private network exceeds the number of available public IP addresses, or to hide the internal network structure from the external network.
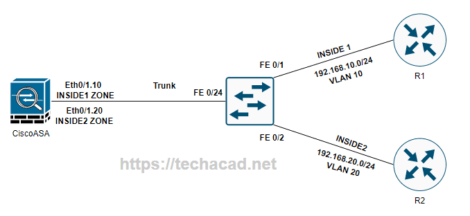
Cisco ASA devices support various NAT configurations, including static NAT, dynamic NAT, and PAT. In this example, we will demonstrate how to configure PAT on a Cisco ASA using the following topology:

In this topology, the private network has a subnet of 10.0.0.0/24 and the public network has a subnet of 198.51.100.0/24. The Cisco ASA device is connected to both networks and will act as a NAT device, allowing devices on the private network to access the internet through the public network.
Here is the step-by-step procedure for configuring PAT on a Cisco ASA:
- Connect to the Cisco ASA device using a console or SSH connection.
- Enter configuration mode by typing
configure terminaland pressing Enter. - Define the inside and outside interfaces of the ASA device. In this example, the inside interface is connected to the private network and the outside interface is connected to the public network.
interface Ethernet0/0
 nameif inside
 security-level 100
 ip address 10.0.0.1 255.255.255.0

interface Ethernet0/1
 nameif outside
 security-level 0
 ip address 198.51.100.1 255.255.255.0
- Enable NAT on the ASA device by using the
natcommand. In this example, we will use PAT with theoverloadoption, which allows multiple private IP addresses to share a single public IP address using different port numbers.
recommended reading
nat (inside,outside) source static any any destination static any any
- Create an access list to define the traffic that should be NATed. In this example, we will allow all traffic from the private network to be NATed.
access-list inside_nat0_outbound extended permit ip 10.0.0.0 255.255.255.0 any
- Apply the access list to the NAT configuration using the
natcommand.
nat (inside,outside) after-auto source dynamic any interface access-list inside_nat0_outbound
- Save the configuration and exit configuration mode.
write memory
exit
That’s it! Your Cisco ASA device is now configured to use PAT to allow devices on the private network to access the internet using a single public IP address.